When I started out airsofting I brought a full face mask with a mesh visor. This works fine but has a couple of disadvantages, it's not that great in low light conditions and your peripheral vision is a little limited. As I also wear glasses my only real alternative was to use the larger skiing type goggles, so I decided to buy a pair of ESS Military Land Ops™ goggles.
After using them a few times I would say they were a great buy. They are really comfortable, fit nicely over my glasses and provide a good full field of vision. Now there is one big advantage to using mesh masks and that's they don't fog up. Unfortunately with goggles if you're in humid conditions, especially in woodland, then after a few mins of running about they'll soon fog up to a point where you can't see a dam thing :-( Having to run for cover away from the action every 5 mins to defog them is no fun at all.
ESS sell versions of these goggles with a built in fan to help stop them from fogging up. They are the ESS Striker TurboFan™ series. However the difference in price between mine (without fan) and those (with fan) is somewhere in the region of £70 (depending on which version you buy). I'd like the fan version but that price difference is a bit steep, so I decided to mod my own for a fraction of the cost.
I'm really happy with how they turned out as they work extremely well. The fans are practically silent and switching them on once you start seeing fogging will clear the visor easily in 5-10 seconds. I'm not 100% sure exactly how long the batteries will power them constantly for, but with my intermittent use during a whole day's skirmishing they were still going strong.
Behind the Scenes
The main components of this mod are two 17x17x8mm fans and the VPack5.0V_AAA_2. The latter will take the input from two AAA batteries and output the 5V required for the fans to run. I did origially attempt to run both fans in series off of a 9V battery, but the 4.5V that provided to each fan wasn't enough to make them turn.
First thing to do is remove the connector off each fan. This can be simply done by sticking a knife or pin into each of the 3 silver lugs on top, the wires will then just pull out. We only need the Black and Red wires so the yellow wire, which is there to provide fan speed monitoring, can be removed (just clip the wire as close to the fan as you can) along with all the labels which easily peel off.
The VPack5.0V_AAA_2 comes as one unit with the circuit board stuck on using hot melt glue. Carefully remove the curcuit board from the battery pack and desolder all the wires. These components can then be mounted onto the goggles separately and resoldered in place. I then replaced the hot melt glue with a double sided sticky foam pad, for later use to attach the curcuit board to the goggles.

My original plan was to mount the fans into the goggles flush with the top surface as you can see in the below image. This would mean that from the front you wouldn't even be able to see the googles had been modified. I stuck with this idea right until I put the visor back in. In doing so the goggles become rigid and then act as a noise amplifier to the fans, which before this were practically silent.
Unfortunately the vibrations from the fans means you end up with a fairly loud humming noise that, in a quiet environment, can be heard from several meters away. Would be ok if you were in the middle of a noisy firefight but not when on a sneeky steath misson. The enemy would soon notice the whining noise from the nearby tree or bush.
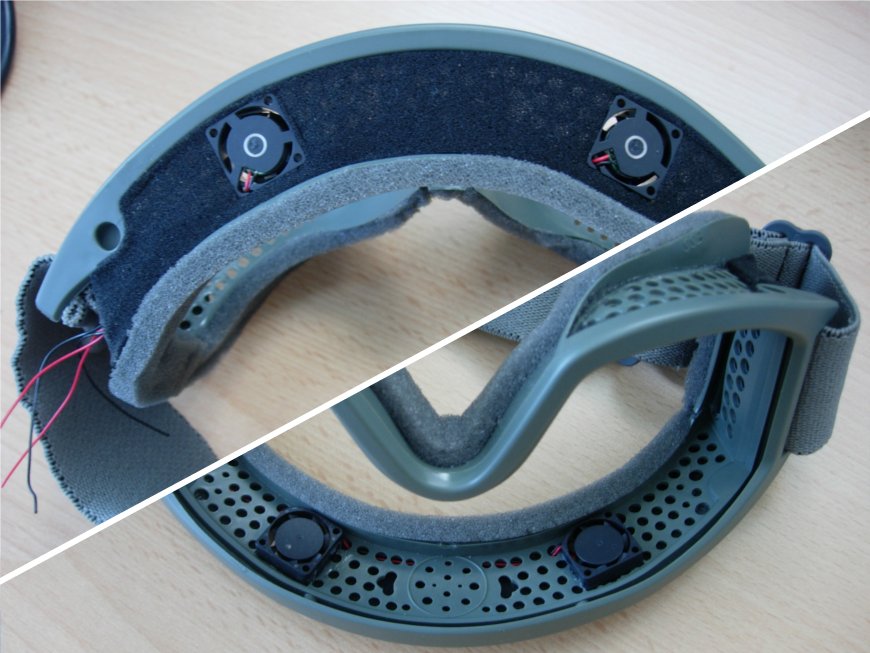
Putting that set back a side the below image is still useful as the holes made for the fans are required to let the airflow through anyway. I simply placed the fans in the intended position and cut round them with a craft knife. The fan wires were then thread through, under the thin black foam which fortunately is only stuck down along the edges. As the goggles are symmetrical it's not important which side they come out from. Just pick which ever side feels best to you for the later placement of switch and battery pack.
You will also notice that I removed most of the thin black foam covering the bottom. This was done to improve the air flow through the goggles. The fans will be mounted so that they blow the hot air out of the top, which will therefore suck fresh air in from the bottom.
The VPack5.0V_AAA_2 comes with a jumper for enabling/disabling power from the battery pack. Obviously this isn't practical for use on the field so I brought a small switch and soldered that directly to the pins. I mounted my switch into a scrap piece of plastic I had laying around. I then fixed it in place using a small screw from the inside (through one of the existing air holes) and super glue for good measure. The curcuit board was then held in place using the double sided stick pad, with the solder also helping in this respect too.
The actual wiring part is very easy, just don't forget to put heat shrink over the wires before you start :). Removing the front visor would be highly recommend if you haven't already done so. Melting that from a stray piece of solder wouldn't be a great idea.
First the battery pack wires need to be extended so that it can later be attached to the inside of the goggle strap. Once done solder them back onto the points where they were originally connected. You can see from the picture below that for the fans you just need to solder the two red wires together to the same contact and both black ones to the other side. This will give both fans the 5V they require when turning everything on.
Now put some batteries into the battery pack and flick the switch to test they successfully turn on and off.
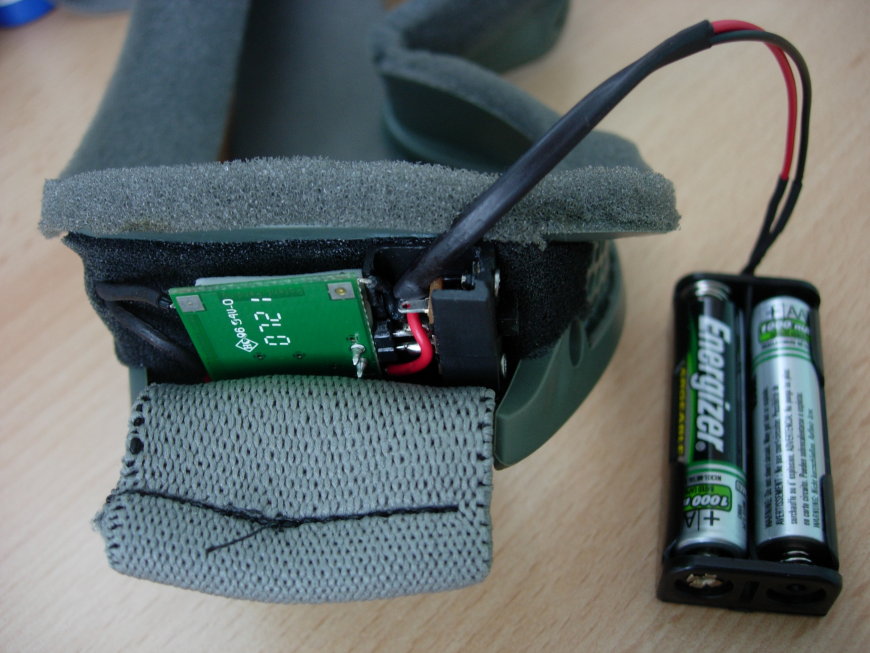
If you put the goggles on you'll find there is a large gap on each side, at the front, where the battery pack can comfortably be mounted. I used the existing 3 holes on the back of battery pack to attach it by sowing it in place. With it mounted there the batteries can then be easily replaced (I use 1000mah rechargables) and you can't even see them or the wires while they are on.
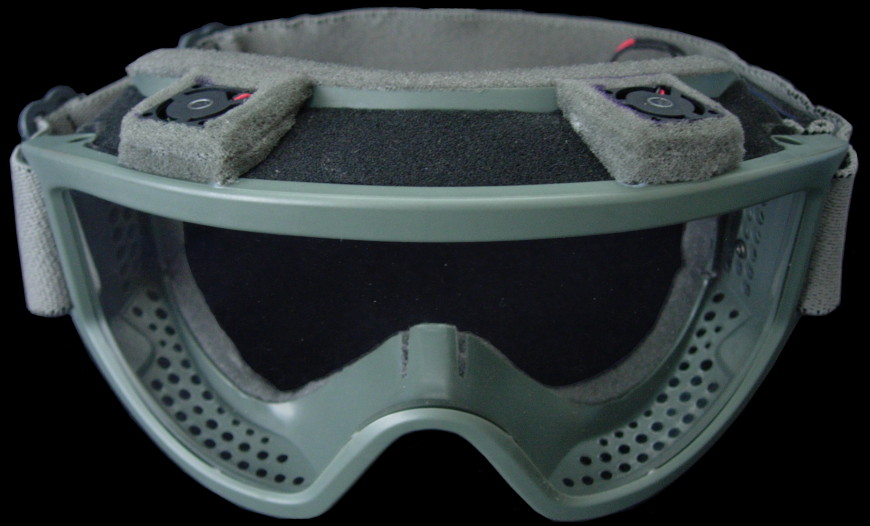
As previously mentioned, if you just mount the fans flush into the goggles (as I had originally planned) then you'll get an annoying and unwanted whining noise from the fan vibrations. To get around this problem, after trying many other ideas that failed, I mounted them above the two holes using foam and super glued the fans in place. The foam I used is almost identical to that already attached as padding on the inside and back. Using this method, when the fans are on, other players can't hear them at all even if you are standing right next to them.